Navigating the Drip: A Comprehensive Guide to Fixing a Leak Under Kitchen Sink
Discovering a leak under kitchen sink is a common homeowner headache. That persistent drip, drip, drip isn’t just annoying; it can lead to water damage, mold growth, and wasted water – all of which impact your wallet and potentially your health. This comprehensive guide provides a step-by-step approach to identifying, diagnosing, and ultimately fixing that pesky leak under kitchen sink. We’ll walk you through everything from gathering the right tools to understanding the common culprits behind these leaks, empowering you to tackle this problem head-on.
Understanding the Anatomy of Your Kitchen Sink Plumbing
Before diving into the repair process, it’s crucial to understand the basic components of your kitchen sink plumbing. Familiarizing yourself with these parts will make diagnosing the leak under kitchen sink significantly easier. Key components include:
- Supply Lines: These flexible tubes connect your shut-off valves to the faucet. They deliver hot and cold water.
- Shut-off Valves: Located under the sink, these valves control the water supply to the faucet. Knowing their location is essential for quickly stopping the water flow in case of a major leak.
- Faucet: The faucet itself, where water is dispensed. Leaks can originate from the base, spout, or handle.
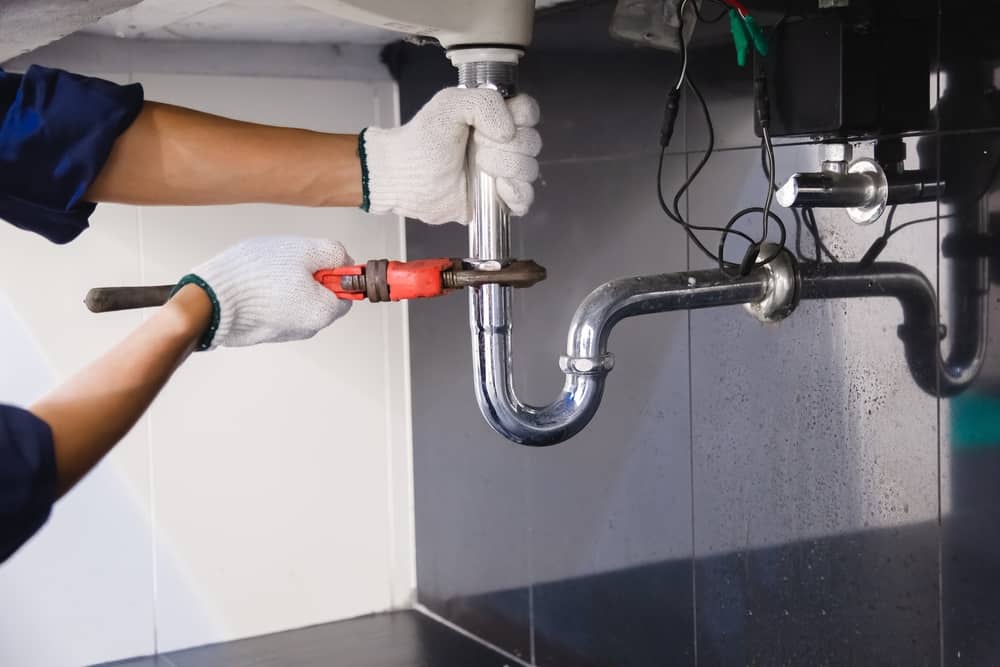
- Drain Pipes: This system carries wastewater away. It typically includes the tailpiece, P-trap, and drainpipe.
- P-Trap: The curved section of pipe under the sink. It traps debris and prevents sewer gases from entering your home.
- Garbage Disposal (if applicable): A device that grinds food waste before it enters the drain.
Identifying the Source of the Leak
The first step in fixing a leak under kitchen sink is pinpointing its exact origin. This requires a bit of detective work. Here’s how to approach it:
- Clear the Area: Remove everything from under the sink to give yourself a clear view of the plumbing.
- Dry Everything: Use a towel or paper towels to thoroughly dry all the pipes, connections, and the surrounding area. This will make it easier to spot the source of the new leak.
- Observe Carefully: Turn on the faucet and watch closely for any drips or trickles. Check all connections, including supply lines, the base of the faucet, the drain pipes, and the garbage disposal (if you have one).
- Use a Flashlight: A flashlight can help you see into tight spaces and identify even small leaks.
- Check While in Use: Run the faucet with hot and cold water, and also when the garbage disposal is running, to see if the leak only appears under specific conditions.
Common Causes of a Leak Under Kitchen Sink
Several factors can contribute to a leak under kitchen sink. Understanding these common causes can help you narrow down the problem:
- Loose Connections: Over time, connections can loosen due to vibrations and temperature changes. This is a common cause, especially in older plumbing.
- Worn-Out Washers and O-Rings: These rubber components provide a watertight seal. Over time, they can dry out, crack, or become brittle, leading to leaks.
- Corroded Pipes: Corrosion can weaken pipes, causing them to leak or even burst. This is more common in older homes with galvanized steel pipes.
- Damaged Supply Lines: Supply lines can become kinked, cracked, or corroded, leading to leaks.
- Clogged Drain: A clogged drain can cause water to back up and leak from connections.
- Faulty Faucet: Internal components of the faucet can wear out, leading to leaks from the spout, handle, or base.
- Garbage Disposal Issues: Leaks can occur around the garbage disposal’s connections or from the disposal unit itself if it’s damaged.
Tools and Materials You’ll Need
Before starting any repairs on the leak under kitchen sink, gather the necessary tools and materials. Having everything on hand will make the process smoother and more efficient.
- Adjustable Wrench: For tightening and loosening connections.
- Basin Wrench: Specifically designed for reaching tight spaces under the sink.
- Pliers: For gripping and holding parts.
- Screwdrivers (Phillips and Flathead): For removing screws and disassembling components.
- Plumber’s Tape (Teflon Tape): For sealing threaded connections.
- Plumber’s Putty: For sealing around the base of the faucet and drain.
- Replacement Washers and O-Rings: Have a variety of sizes on hand to replace worn-out components.
- Bucket: To catch any water that spills.
- Towels or Rags: For cleaning up spills and drying parts.
- Safety Glasses: To protect your eyes.
- Gloves: To protect your hands.
Step-by-Step Guide to Fixing Common Kitchen Sink Leaks
Now that you’ve identified the source of the leak under kitchen sink and gathered your tools, let’s get to the repair. Here are some common scenarios and how to address them:
Tightening Loose Connections
This is often the easiest fix. Use an adjustable wrench to gently tighten any loose connections. Be careful not to overtighten, as this can damage the pipes or fittings. If tightening doesn’t stop the leak, proceed to the next step.
Replacing Washers and O-Rings
If the leak is coming from a connection, such as where the supply line connects to the faucet or shut-off valve, the washer or O-ring may be worn out. To replace it:
- Turn off the water supply to the sink.
- Disconnect the fitting.
- Remove the old washer or O-ring.
- Install a new washer or O-ring of the correct size.
- Reconnect the fitting and tighten it securely.
- Turn the water supply back on and check for leaks.
Addressing Leaks in the Drain Pipes
Leaks in the drain pipes are often caused by loose connections or damaged components. Here’s how to fix them:
- Turn off the water supply to the sink.
- Place a bucket under the drain pipes to catch any water.
- Loosen the slip nuts that connect the drain pipes.
- Inspect the pipes and fittings for any cracks or damage. Replace any damaged components.
- Apply plumber’s tape to the threads of the pipes.
- Reassemble the drain pipes, tightening the slip nuts securely.
- Run water down the drain to check for leaks.
Repairing a Leaky Faucet
Faucet leaks can be more complex to repair, as they often involve internal components. If the leak is coming from the spout, handle, or base of the faucet, you may need to disassemble the faucet to replace worn-out parts. Refer to the faucet manufacturer’s instructions for specific guidance. If you’re not comfortable disassembling the faucet, consider replacing it.
Dealing with a Leaky Garbage Disposal
Leaks around the garbage disposal can be caused by loose connections or damage to the unit itself. Check the connections where the disposal attaches to the sink and the drainpipe. Tighten any loose connections. If the leak persists, the disposal unit may be cracked or corroded. In this case, it’s best to replace the garbage disposal.
Preventing Future Leaks
Once you’ve fixed the leak under kitchen sink, take steps to prevent future problems:
- Regularly Inspect Plumbing: Check under your sink periodically for any signs of leaks or corrosion.
- Tighten Connections: Occasionally tighten any loose connections to prevent leaks from developing.
- Replace Worn-Out Parts: Replace washers, O-rings, and supply lines as needed.
- Avoid Overloading the Garbage Disposal: Avoid putting large amounts of food waste down the garbage disposal, as this can clog the drain and put stress on the plumbing.
- Flush the Drain: Periodically flush the drain with hot water and baking soda to prevent clogs.
When to Call a Professional Plumber
While many kitchen sink leaks can be fixed with DIY methods, there are times when it’s best to call a professional plumber. Consider calling a plumber if:
- You’re not comfortable working with plumbing.
- You can’t identify the source of the leak.
- The leak is severe or causing significant water damage.
- You suspect there’s a problem with your home’s main water line.
- You’ve tried to fix the leak yourself, but it’s still persisting.
Addressing a leak under kitchen sink promptly can save you money and prevent further damage to your home. By following the steps outlined in this guide, you can confidently tackle many common kitchen sink leaks and keep your plumbing in good working order. Remember to always prioritize safety and consult a professional if you’re unsure about any aspect of the repair process. Ignoring a small leak under kitchen sink can lead to bigger, more expensive problems down the road. Regular maintenance and prompt attention to any signs of trouble are key to keeping your kitchen plumbing functioning smoothly.
Don’t let a leak under kitchen sink dampen your day. Take control of the situation, follow these guidelines, and enjoy a leak-free kitchen!
[See also: How to Replace a Kitchen Faucet]
[See also: Troubleshooting Common Plumbing Problems]

