How to Add Your Website to Moz for Enhanced SEO
In today’s digital landscape, Search Engine Optimization (SEO) is paramount for ensuring your website reaches its target audience. Among the plethora of SEO tools available, Moz stands out as a comprehensive platform offering valuable insights and resources. This article will guide you through the process of how to add website to Moz, unlocking its potential to improve your site’s visibility and performance. We’ll explore the benefits of using Moz, the steps involved in adding your website, and how to leverage its features for optimal SEO results. Understanding how to add website to Moz is crucial for any website owner or marketer looking to gain a competitive edge.
Understanding Moz and Its Benefits
Moz is a leading SEO software company that provides a suite of tools designed to help businesses improve their search engine rankings and drive organic traffic. Founded in 2004 by Rand Fishkin and Gillian Muessig, Moz has evolved into a trusted resource for SEO professionals and website owners alike. By understanding how to add website to Moz, you gain access to a wealth of data and insights that can inform your SEO strategy.
Key Benefits of Using Moz:
- Keyword Research: Identify relevant keywords with high search volume and low competition.
- Rank Tracking: Monitor your website’s ranking for specific keywords over time.
- Site Audits: Identify technical SEO issues that may be hindering your website’s performance.
- Backlink Analysis: Analyze your backlink profile and identify opportunities to build new links.
- Competitive Analysis: Compare your website’s performance to that of your competitors.
- On-Page Optimization: Get recommendations for optimizing your website’s content and structure.
These benefits highlight the importance of understanding how to add website to Moz and utilizing its features effectively. By leveraging Moz’s tools, you can gain a deeper understanding of your website’s SEO performance and make informed decisions to improve your rankings.
Step-by-Step Guide: How to Add Your Website to Moz
Adding your website to Moz is a straightforward process that involves creating an account, verifying your website, and configuring your settings. Here’s a detailed guide on how to add website to Moz:
Step 1: Create a Moz Account
The first step is to create a Moz account. You can choose between a free Moz Community account or a paid Moz Pro subscription. While the free account offers limited features, it’s a great way to get started and explore the platform. A Moz Pro subscription provides access to the full suite of tools and features.
- Visit the Moz website (moz.com).
- Click on the “Sign Up” button.
- Choose your desired account type (free or paid).
- Fill out the registration form with your information.
- Verify your email address by clicking on the link sent to your inbox.
Step 2: Add Your Website to Moz Pro Campaign
Once you have a Moz account, the next step is to add your website as a campaign within Moz Pro. This allows Moz to track your website’s performance and provide you with insights.
- Log in to your Moz Pro account.
- Click on the “Campaigns” tab.
- Click on the “Create Campaign” button.
- Enter your website’s URL in the “Website” field.
- Enter a name for your campaign in the “Campaign Name” field.
- Select your target location in the “Target Location” field.
- Click on the “Create Campaign” button.
Step 3: Verify Your Website
After adding your website, you’ll need to verify that you own or have control over it. Moz offers several methods for verifying your website:
- HTML File Upload: Upload a specific HTML file provided by Moz to the root directory of your website.
- Meta Tag: Add a meta tag provided by Moz to the <head> section of your website’s homepage.
- Google Analytics: Connect your Google Analytics account to Moz.
- Google Search Console: Connect your Google Search Console account to Moz.
Choose the verification method that works best for you and follow the instructions provided by Moz. Once you’ve verified your website, Moz will begin crawling and analyzing it.
Step 4: Configure Your Campaign Settings
After verifying your website, you can configure your campaign settings to customize the data and insights you receive. This includes setting up keyword tracking, competitor tracking, and site crawl settings.
- Keyword Tracking: Add the keywords you want to track your website’s ranking for.
- Competitor Tracking: Add the websites of your competitors to track their performance.
- Site Crawl Settings: Configure how often Moz crawls your website and which pages to include or exclude.
By configuring your campaign settings, you can tailor Moz to your specific SEO goals and needs. Regularly review and update these settings to ensure you’re getting the most relevant data.
Leveraging Moz for SEO Success
Once you’ve successfully learned how to add website to Moz, the real work begins: leveraging its features to improve your SEO. Here are some ways to utilize Moz for SEO success:
Conduct Keyword Research
Moz’s Keyword Explorer tool is a powerful resource for identifying relevant keywords with high search volume and low competition. Use this tool to find keywords that your target audience is searching for and incorporate them into your website’s content.
Perform Site Audits
Moz’s Site Crawl tool can identify technical SEO issues that may be hindering your website’s performance. Regularly run site audits to identify and fix issues such as broken links, missing meta descriptions, and slow page load times.
Analyze Backlink Profile
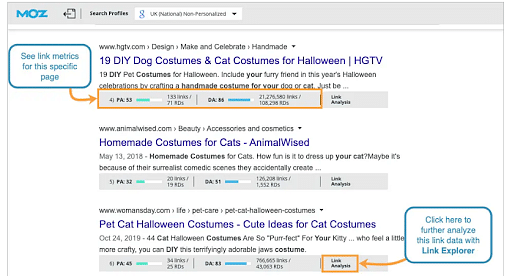
Moz’s Link Explorer tool allows you to analyze your website’s backlink profile and identify opportunities to build new links. Focus on acquiring high-quality backlinks from reputable websites in your industry.
Track Your Rankings
Moz’s Rank Tracker tool allows you to monitor your website’s ranking for specific keywords over time. Track your rankings to see how your SEO efforts are paying off and identify areas for improvement.
Monitor Competitors
Moz allows you to track your competitors’ performance and identify their strengths and weaknesses. Use this information to inform your own SEO strategy and find opportunities to outperform your competitors. [See also: Competitive SEO Analysis: A Comprehensive Guide]
Troubleshooting Common Issues
While adding your website to Moz is generally a straightforward process, you may encounter some common issues. Here are some troubleshooting tips:
- Verification Issues: If you’re having trouble verifying your website, double-check that you’ve followed the instructions correctly and that the verification file or meta tag is properly implemented.
- Data Discrepancies: If you notice discrepancies between Moz’s data and your own data, keep in mind that Moz’s data is based on its own crawling and analysis. These differences are normal and may be due to different crawling schedules or data sources.
- Slow Crawling: If Moz is taking a long time to crawl your website, make sure that your website is not blocking Moz’s crawler and that your server is responding quickly.
By addressing these common issues, you can ensure that you’re getting the most accurate and up-to-date data from Moz.
Conclusion
Learning how to add website to Moz is a fundamental step in optimizing your online presence. By leveraging Moz’s suite of tools, you can gain valuable insights into your website’s SEO performance and make informed decisions to improve your rankings. From keyword research to site audits and backlink analysis, Moz provides the resources you need to succeed in today’s competitive digital landscape. So, take the time to add website to Moz and unlock its potential to drive organic traffic and grow your business. Don’t underestimate the power of SEO, and with Moz, you’ll have a powerful ally in your corner. Remember to continuously monitor, analyze, and adapt your strategy based on the insights Moz provides to stay ahead of the curve.

