
DIY Concrete Patio: A Comprehensive Guide to Building Your Own Outdoor Oasis
Dreaming of a beautiful outdoor space to relax and entertain? A DIY concrete patio could be the perfect solution. Building your own patio not only saves you money but also allows you to customize the design to perfectly suit your style and needs. This comprehensive guide will walk you through every step of the process, from planning and preparation to pouring and finishing your DIY concrete patio. Whether you’re a seasoned DIYer or a complete beginner, we’ll provide the information and tips you need to create a stunning and durable outdoor living area. Investing the time and effort into a DIY concrete patio project can drastically enhance your home’s value and enjoyment. Remember, safety is paramount, so always wear appropriate protective gear. Also, consider local building codes and regulations before you begin any construction. Let’s get started on your DIY concrete patio journey!
Planning Your DIY Concrete Patio
Before you even think about mixing concrete, careful planning is essential. This stage involves determining the size, shape, and location of your DIY concrete patio, as well as considering drainage, accessibility, and any necessary permits.
Choosing the Right Location
The location of your DIY concrete patio is crucial. Consider factors such as sunlight exposure, proximity to your house, and the surrounding landscape. A sunny spot might be ideal for sunbathing, while a shaded area could be perfect for relaxing on hot summer days. Also, think about how you plan to use the patio. If you intend to use it for outdoor dining, you’ll want it to be close to your kitchen. Ensure the location is relatively level to minimize excavation.
Determining the Size and Shape
The size of your DIY concrete patio should be proportional to your yard and accommodate your intended use. Consider how many people you typically entertain and the size of your outdoor furniture. A small patio might be sufficient for a cozy seating area, while a larger patio could accommodate a dining table and chairs. As for shape, you can choose from a variety of options, such as rectangular, square, circular, or freeform. A freeform patio can add a unique and organic touch to your landscape. Use stakes and string to mark out the proposed dimensions of your DIY concrete patio. This will give you a visual representation of the space and help you make any necessary adjustments.
Checking Local Codes and Regulations
Before you start any construction, it’s essential to check your local building codes and regulations. Some areas may require permits for DIY concrete patio projects, especially if they exceed a certain size or are located close to property lines. Contact your local building department to inquire about any necessary permits and inspections.
Planning for Drainage
Proper drainage is essential to prevent water from pooling on your patio and causing damage. Ensure your DIY concrete patio slopes slightly away from your house to allow water to run off. You can also install a drainage system, such as a French drain, to divert water away from your patio. Consider the existing drainage patterns in your yard and make sure your patio doesn’t disrupt them.
Preparing the Site for Your DIY Concrete Patio
Once you’ve planned your patio, the next step is to prepare the site. This involves clearing the area, excavating the soil, and creating a stable base for your DIY concrete patio.
Clearing the Area
Start by removing any grass, plants, rocks, or other debris from the area where you plan to build your DIY concrete patio. Use a shovel, rake, and wheelbarrow to clear the site completely. Remove any tree roots that could potentially cause problems later on.
Excavating the Soil
Excavate the soil to a depth of at least 4-6 inches. This will provide enough space for a base layer of gravel and the concrete slab. Use a shovel and wheelbarrow to remove the excavated soil. Ensure the excavation is level and uniform. Use a level and a measuring tape to check the depth and levelness of the excavation.
Creating a Base Layer of Gravel
A base layer of gravel is essential for providing drainage and stability for your DIY concrete patio. Spread a 4-inch layer of gravel over the excavated area. Use a rake to distribute the gravel evenly. Compact the gravel with a plate compactor or hand tamper. This will ensure a solid and stable base for your patio.
Building the Forms
Forms are used to contain the concrete while it’s being poured and to create the desired shape and thickness of your DIY concrete patio. Use lumber to build the forms. The lumber should be the same thickness as the desired thickness of your concrete slab. Assemble the forms using screws or nails. Ensure the forms are level and securely anchored to the ground. Use stakes to support the forms and prevent them from bowing outward. Double-check the measurements and angles to ensure the forms are accurate.
Pouring and Finishing Your DIY Concrete Patio
Now comes the exciting part: pouring and finishing the concrete for your DIY concrete patio. This requires careful attention to detail and a bit of physical effort.
Mixing the Concrete
You can either mix the concrete yourself using a concrete mixer or purchase ready-mix concrete from a supplier. Mixing the concrete yourself is more economical, but it requires more time and effort. Ready-mix concrete is more convenient, but it’s also more expensive. Follow the manufacturer’s instructions for mixing the concrete. Add water gradually until the concrete reaches the desired consistency. The concrete should be wet but not too runny. Avoid adding too much water, as this can weaken the concrete.
Pouring the Concrete
Pour the concrete into the forms, starting at one corner and working your way across. Use a shovel to distribute the concrete evenly. Avoid pouring too much concrete in one spot, as this can cause the forms to buckle. Fill the forms completely, ensuring the concrete is level with the top of the forms.
Screeding the Concrete
Screeding is the process of leveling the concrete surface. Use a screed board to remove any excess concrete and create a smooth, even surface. Rest the screed board on the forms and pull it across the concrete in a sawing motion. Overlap each pass slightly to ensure a smooth surface. Remove any bumps or dips with a shovel or trowel.
Floating the Concrete
Floating is the process of embedding the aggregate and smoothing the concrete surface. Use a float to work the surface of the concrete. A float can be made of wood or magnesium. Work the float in overlapping circular motions. This will help to remove any imperfections and create a smooth, even surface. Avoid over-floating, as this can weaken the concrete.
Edging and Jointing
Edging and jointing are important for preventing cracks and creating a professional finish. Use an edger to round the edges of the DIY concrete patio. This will prevent the edges from chipping or cracking. Use a jointer to create control joints in the concrete. Control joints are shallow grooves that help to control where the concrete cracks. Space the control joints evenly across the patio. The depth of the control joints should be about one-quarter of the thickness of the concrete slab.
Finishing the Concrete
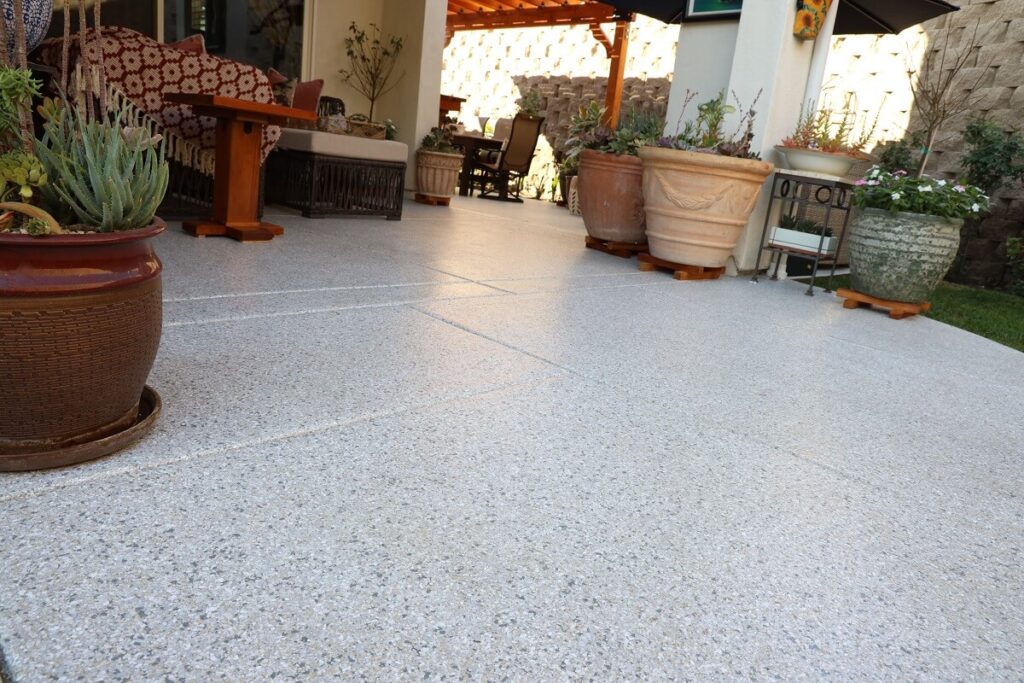
There are several different ways to finish the concrete surface, depending on the desired look. You can use a broom to create a textured finish, a trowel to create a smooth finish, or a stamp to create a decorative finish. A broom finish is a good choice for patios, as it provides good traction and is slip-resistant. A smooth finish is more formal and elegant. A stamped finish can add a unique and decorative touch to your patio. Apply the finish to the concrete while it’s still wet.
Curing the Concrete
Curing is the process of keeping the concrete moist while it hardens. This is essential for preventing cracks and ensuring the concrete reaches its full strength. Cover the concrete with plastic sheeting or wet burlap. Keep the concrete moist for at least 7 days. You can also use a curing compound to seal the concrete and prevent it from drying out too quickly.
Adding the Finishing Touches to Your DIY Concrete Patio
Once the concrete has cured, you can add the finishing touches to your DIY concrete patio. This might include sealing the concrete, adding furniture, and landscaping.
Sealing the Concrete
Sealing the concrete will protect it from stains, water damage, and wear and tear. Choose a concrete sealer that is appropriate for your climate and the intended use of your patio. Apply the sealer according to the manufacturer’s instructions. Reapply the sealer every few years to maintain its effectiveness.
Adding Furniture and Decor
Add furniture and decor to create a comfortable and inviting outdoor space. Choose furniture that is durable and weather-resistant. Add cushions, pillows, and throws to make the space more comfortable. Add plants, flowers, and other decorative items to personalize the space.
Landscaping Around the Patio
Landscaping around the patio can enhance its beauty and create a more inviting atmosphere. Plant flowers, shrubs, and trees around the patio. Add a pathway leading to the patio. Install outdoor lighting to illuminate the patio at night.
Enjoying Your New DIY Concrete Patio
Congratulations! You’ve successfully built your own DIY concrete patio. Now it’s time to sit back, relax, and enjoy your new outdoor oasis. Invite friends and family over for a barbecue, relax with a good book, or simply enjoy the fresh air and sunshine. Your new DIY concrete patio will provide you with years of enjoyment. Remember to properly maintain your patio by cleaning it regularly and resealing it as needed. With proper care, your DIY concrete patio will be a beautiful and functional addition to your home for many years to come. Consider adding a fire pit for cooler evenings or an outdoor kitchen for entertaining. The possibilities are endless when you have your own custom-built DIY concrete patio.
[See also: Designing the Perfect Outdoor Living Space]
[See also: Choosing the Right Concrete Sealer]
[See also: Landscaping Ideas for Your Patio]

