
Stop the Drip: A Comprehensive Guide to Fixing a Leaking Faucet Hose
A leaking faucet hose is more than just a minor annoyance; it’s a signal of potential water damage, wasted resources, and escalating water bills. Addressing a leaking faucet hose promptly can save you money, prevent structural damage, and contribute to water conservation. This comprehensive guide provides a step-by-step approach to identifying, diagnosing, and fixing a leaking faucet hose, empowering you to tackle this common plumbing issue with confidence.
Understanding the Anatomy of a Faucet Hose
Before diving into the repair process, it’s crucial to understand the components involved. A typical faucet hose connects the water supply lines (hot and cold) to the faucet itself. These hoses are usually flexible braided stainless steel or reinforced rubber, designed to withstand water pressure and temperature fluctuations. The connections are typically compression fittings or threaded connections with rubber washers.
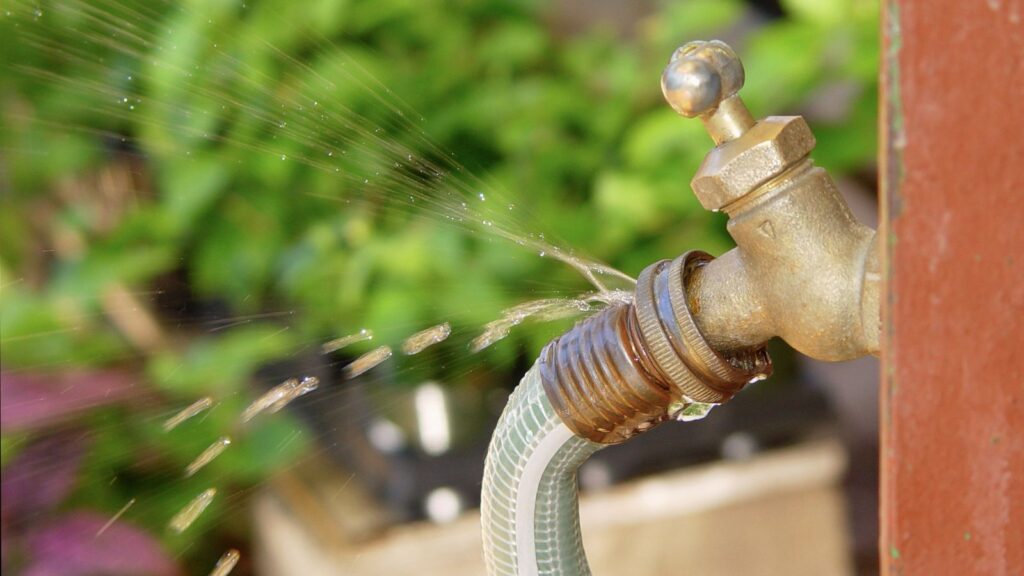
Identifying the Source of the Leak
Pinpointing the exact location of the leaking faucet hose is the first step towards a successful repair. Common areas where leaks occur include:
- Connection Points: Where the hose connects to the water supply valve and the faucet tailpiece.
- Hose Body: Cracks, bulges, or punctures along the length of the hose.
- Washers and O-rings: Deterioration or improper seating of these sealing components.
Carefully inspect each area, using a flashlight if necessary, to identify the precise point where water is escaping. A dry paper towel can help you isolate the leak by absorbing moisture and making it easier to see where the water is originating.
Safety First: Shutting Off the Water Supply
Before attempting any repairs, it’s absolutely essential to shut off the water supply to the faucet. Locate the shut-off valves under the sink, typically one for hot water and one for cold water. Turn both valves clockwise until they are completely closed. If you cannot locate or access the shut-off valves under the sink, you may need to shut off the main water supply to your entire house. After shutting off the water, turn on the faucet to relieve any remaining pressure in the lines.
Gathering the Necessary Tools and Materials
Having the right tools and materials on hand will streamline the repair process. Here’s a list of essential items:
- Adjustable Wrench or Basin Wrench: For loosening and tightening connections. A basin wrench is particularly useful for reaching tight spaces under the sink.
- New Faucet Hose(s): Purchase replacement hoses that are the same length and type as the old ones. It’s generally recommended to replace both hot and cold water hoses at the same time to ensure consistent performance and prevent future leaks.
- New Washers and O-rings: Even if the hose itself isn’t damaged, replacing the washers and O-rings can often resolve minor leaks.
- Plumber’s Tape (Teflon Tape): To create a watertight seal on threaded connections.
- Bucket or Towel: To catch any residual water.
- Screwdriver: Depending on the faucet model, you may need a screwdriver to remove mounting hardware.
- Cleaning Supplies: A rag and cleaning solution to clean up any spills or debris.
Replacing a Leaking Faucet Hose: A Step-by-Step Guide
With the water shut off and your tools ready, follow these steps to replace the leaking faucet hose:
- Disconnect the Old Hose: Use the adjustable wrench or basin wrench to loosen the connections at both ends of the hose. Be prepared for a small amount of water to spill out. Carefully remove the old hose.
- Inspect the Connections: Check the faucet tailpiece and the water supply valve for any corrosion or damage. Clean the threads thoroughly with a wire brush if necessary.
- Apply Plumber’s Tape: If the connections are threaded, wrap the threads with plumber’s tape in a clockwise direction. Apply two to three layers of tape to ensure a tight seal.
- Install the New Hose: Connect the new hose to the faucet tailpiece and the water supply valve. Hand-tighten the connections first, then use the wrench to tighten them further. Be careful not to overtighten, as this can damage the connections or the hose.
- Check for Leaks: Slowly turn the water supply valves back on, one at a time. Carefully inspect the connections for any leaks. If you see any leaks, tighten the connections slightly. If the leak persists, turn off the water supply and re-inspect the connections and washers. [See also: Troubleshooting Faucet Leaks]
- Test the Faucet: Once you’re confident that there are no leaks, turn on the faucet and let the water run for a few minutes. Check for any leaks under the sink.
Addressing Leaks at Connection Points
If the leaking faucet hose is originating from the connection points, you may not need to replace the entire hose. In many cases, simply replacing the washers or O-rings can solve the problem. Follow these steps:
- Disconnect the Hose: Follow the steps outlined above to disconnect the hose from the leaking connection.
- Inspect the Washer or O-ring: Remove the old washer or O-ring and inspect it for damage, such as cracks, tears, or flattening.
- Replace the Washer or O-ring: Install a new washer or O-ring of the same size and type. Ensure that it is properly seated in the connection.
- Reconnect the Hose: Reconnect the hose and tighten the connection.
- Check for Leaks: Turn on the water supply and check for leaks.
When to Call a Professional Plumber
While many leaking faucet hose repairs can be handled as DIY projects, there are situations where it’s best to call a professional plumber. These include:
- Extensive Corrosion: If the water supply valves or faucet tailpiece are heavily corroded, it may be difficult to create a watertight seal.
- Frozen Pipes: If the leak is caused by a burst pipe due to freezing temperatures, it’s essential to call a plumber to assess the damage and make the necessary repairs.
- Lack of Experience: If you’re uncomfortable working with plumbing or if you’ve attempted the repair and are still experiencing leaks, it’s best to err on the side of caution and call a professional.
Preventing Future Leaks
Taking proactive steps can help prevent future leaking faucet hose issues. Here are some tips:
- Regular Inspection: Periodically inspect your faucet hoses for any signs of wear and tear, such as cracks, bulges, or leaks.
- Proper Installation: Ensure that faucet hoses are properly installed and tightened. Avoid overtightening, as this can damage the connections.
- Use Quality Hoses: Choose high-quality faucet hoses that are designed to withstand water pressure and temperature fluctuations.
- Replace Hoses Periodically: Even if the hoses appear to be in good condition, it’s recommended to replace them every five to ten years.
- Protect from Freezing: In cold climates, take steps to protect your pipes from freezing, such as insulating them or letting the faucet drip slightly during extremely cold weather. [See also: Winterizing Your Plumbing System]
The Environmental and Economic Impact of Leaking Faucets
A seemingly small leaking faucet hose can have a significant impact on both the environment and your wallet. Even a slow drip can waste gallons of water over time, contributing to water scarcity and increasing your water bill. By addressing leaks promptly, you can conserve water, reduce your environmental footprint, and save money.
Conclusion
Fixing a leaking faucet hose is a manageable DIY project that can save you money and prevent water damage. By following the steps outlined in this guide, you can confidently diagnose and repair most common faucet hose leaks. Remember to prioritize safety by shutting off the water supply before starting any repairs, and don’t hesitate to call a professional plumber if you encounter any difficulties. By taking proactive steps to maintain your plumbing system, you can prevent future leaks and enjoy a trouble-free plumbing experience.

